


Drawing Rocks
Tutorial by Diane Wright
- part one
- part two
part one
Rocks
While I haven’t had the opportunity to draw many rocks in my landscapes (yet), they can certainly add interest to any landscape. I consider them just one more opportunity to add a different texture to the scene.There are different kinds of rock formations. From sandstone, shale, limestone, volcanic to boulders. Each one will hold different textures and 'feel' to them.
This lesson will be very specific and we are going to study the drawing of a close-up view of rocks. Our goal is two fold. 1) To understand the how to create the shape and depth of rocks, and 2) to learn how to create textured, realistic looking rocks.
Materials Needed:
- F and 2B .5 mechanical pencils
- 4H and 2H clutch pencils
- Blu-Tack or kneaded eraser
- Battery operated eraser
- Strathmore 300 Series Bristol Board Smooth paper
Sketching
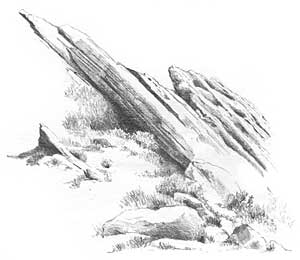 Sketching… Never underestimate the power of just sketching. I seldom just sit and watch television, but when I do, I usually have a folder full of photos and I just sketch. Here is a sketch of a group of rocks...
Find some photos of rocks and sketch them. Don't let the rest of the landscape intimidate you as you sketch the rocks. Pick out the sections that interest you and just sketch.
Creating three-dimensionality and form
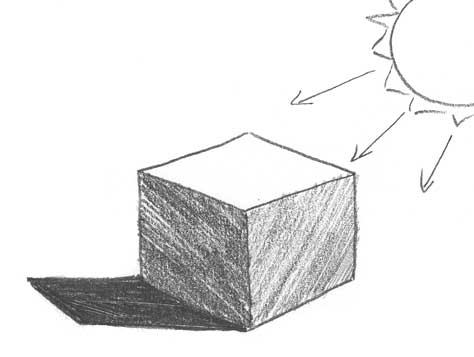
At first glance they seem to be easy to draw. I find they a bit more challenging than that. They beg to have three-dimensionality and form. Light and shading play an important roll in drawing realistic rocks.I find the best comparison to make is to use a cube. In order to create this three-dimensional form we have to use light and shadow. The plane with the most direct sunlight is the brightest. The plane with the no sunlight is the darkest. With a strong light, the shadow will be short and dark.
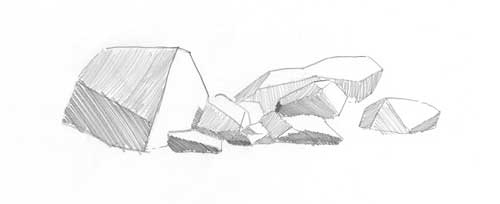
Let's relate this concept to a grouping of rocks. These rocks are drawn to emphasize their angles and planes. The light source is to the upper right.
This sketch softens the edges of the rocks but the planes are still very visible, creating solid three-dimensional rocks.
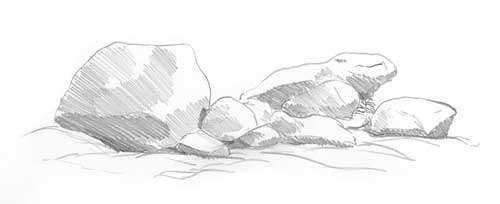
I find most tutorials stop at this point when explaining how to draw rocks. Do you see the problem with this? Will these sketches really work in a realistic landscape? What's missing or rather what is there too much of?? White. There is just not enough tone or detail too.
So let’s keep going.....
This sketch softens the edges of the rocks but the planes are still very visible, creating solid three-dimensional rocks.
I find most tutorials stop at this point when explaining how to draw rocks. Do you see the problem with this? Will these sketches really work in a realistic landscape? What's missing or rather what is there too much of?? White. There is just not enough tone or detail too.
So let’s keep going.....
- part one
- part two