


How to draw Trees
Tutorial by Diane Wright
- part one
- part two
part one
First steps
When creating my artwork, the trees and foliage become an integral part of the landscape. How the trees, grass and foliage are represented in a drawing have a direct impact on the entire mood of the drawing.In figuring out how to draw trees myself, I discovered some references that provided me with an excellent foundation to developing my own style. The most influential and important reference that I can recommend is Mike Sibley's book "Drawing from Line to Life". This is the best art technique book on the market. Mike also has an on-line tutorial on trees and grasses at www.SibleyFineArt.com.
Other items that are beneficial include are the Smithsonian Handbook on Trees (This will provide information on the general shapes and varieties of trees) and my digital camera!
Understanding Your Subject Matter
During the past few years, I have spent a lot of time observing and sketching trees. Even though my drawings do not depict individual leaves, I am very aware of the type of leaf it is and how it attaches to the branches. It is so important to understand the substructure of a tree. It's like trying to draw the human body without understanding about muscle, bones etc. Here is my analogy — just as elbows, wrists, fingers, knees, ankles and toes are crucial to express the 'flow' of the human body - the joints (limbs, branches, twigs and roots) are crucial in expressing the 'flow' of the tree.I have sketched out leaves, leaf bundles, branches and different types of trees, trying to understand their general structure. Through observation and sketching, you can discover a lot about trees.
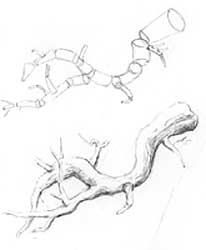
A branch of a tree can be dissected into connecting cylinder tubes.
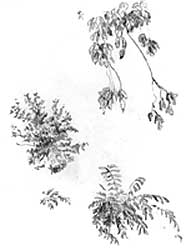
Different leaf groupings
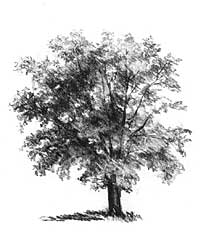
Typical sketches of varieties of trees.
These exercises help you to better understand the textures and three dimensional forms of trees.
These exercises help you to better understand the textures and three dimensional forms of trees.
The anatomy of a tree
Drawing a bare winter tree is an excellent way to learn the anatomy of a tree. Let's start at the base of the tree...How to plant the tree firmly in the ground? I always pay particular attention to this step when drawing. If that tree is not on solid fittings, it will look like it is floating on the paper.
- Most trees will flair out just as they meet the ground. Emphasizing this flare, and avoiding drawing the tree trunk straight, will give the tree a good base.
- Remember that trees are actually a cylinder in shape. The shading should represent a cylindrical object. Also the bark of the tree will gradually get more dense on the edges as it wraps itself around the tree. (See sample below).
- Be sure to put shadow at that base and draw the grass 'around' the trunk.
- Change and vary the weight of your pencil stroke to help develop depth in your tree. The darker areas should have a heavier weighted line. 'Feel' those shadows go through your hand as you lay down that pencil stroke.
The following might seem like very simple and obvious tips - but they are crucial to making that tree sit firmly on the ground.

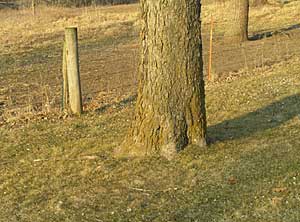
Sketching the base of a tree
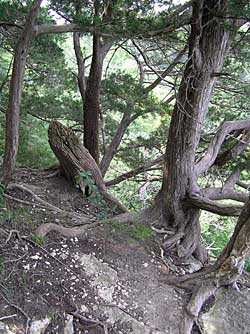
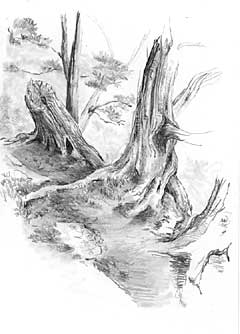
Another example with roots of the trees being exposed
Tips for drawing a winter tree
- Pay particular attention to the 'points of articulation'. This means the point of where every limb attaches to the trunk, every branch to limb and every twig to the branch. This is what helps identifies the type of tree it is. Drawing the correct proportions and angles of these points is what 'creates' the tree.
- A common mistake is drawing the branches too straight. Try to identify those knots and kinks, and those bends in the branches. This gives 'life' to the tree. To help see these, it is helpful to observe the negative space between the branches instead of looking just at the branch.
- Another common mistake is making the branches too thick.
- One more tip...watch the angle of the joints. The angles between the branches should be wider at the bottom of the tree and gradually become tighter at the top of the tree.
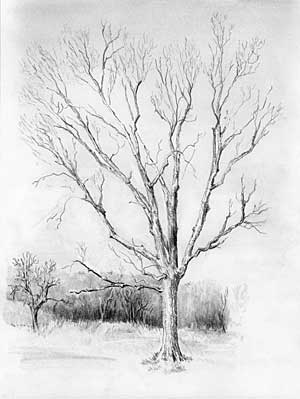
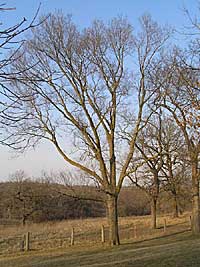
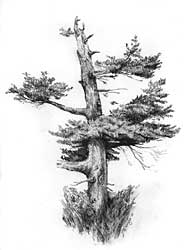
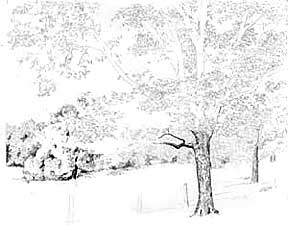
My sketch here uses the same reference tree that I used for the trunk.
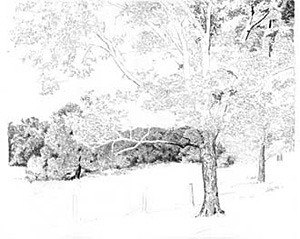
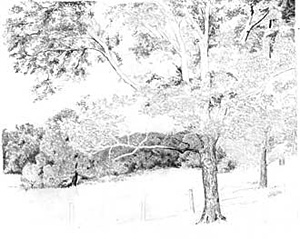
I worked to feel the flow of the limbs and I kept the shading to a minimum. The branches are kept thin and emphasis has been placed on the kinks and knots. I did not draw all those little branches at the top - but gave the suggestion of them. Hopefully, the viewer will 'fill in' the rest. This tree is very simple and non-descriptive but serves to show these tips very well.
I worked to feel the flow of the limbs and I kept the shading to a minimum. The branches are kept thin and emphasis has been placed on the kinks and knots. I did not draw all those little branches at the top - but gave the suggestion of them. Hopefully, the viewer will 'fill in' the rest. This tree is very simple and non-descriptive but serves to show these tips very well.
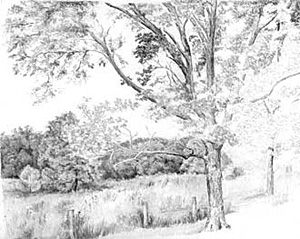
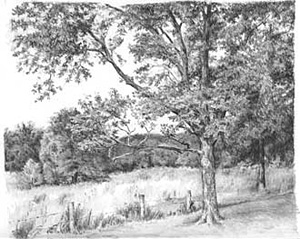
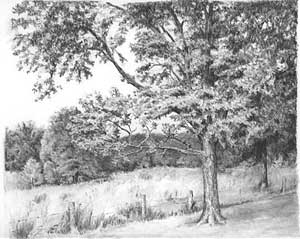
Tips for drawing summer trees
- When I draw a tree with leaves, I don't think about drawing each leaf. Instead I am thinking of what kind of 'texture' or pencil stroke I can use to represent that bundle of leaves. I find that with each variety of tree I draw, my texture seems to change to accommodate the different leaf variety and how the leaf bundles lay.
- The distance of the tree - background, midground, foreground or up-close - determines the size of the texture and detail I place on the tree.
- Always, always, always know where your light source is coming from. This will impact how those leaves will look and how the bundles will be shaded.


- part one
- part two